
How to scarf joint rotten floor joist ends?
In the process of renovating our new home, we noticed one of the gable walls was suffering from Damp. After tracing back, looking for the cause I came across a few joists which had rotten ends. The damp patch on the wall was due to a leaky gutter, allowing water to penetrate down the wall on 2 levels and working its way round the corner stones, thus the damp patch.
After rectifying the gutters, next on the game plan was to fix our rotten floor joists ends.
This subject is as broad as it is wide. Online, you'll find many options as well as different methods of resolving this problem. I'll explain which method of resolution we chose as well as how I executed the fix. This job will not be for everyone but worth being aware of.
In our scenario, the floor joist reside in a street level, north facing room. The room below is basement level, no windows, and granite dry stone walls. The basement room does suffer from severe humidity which is another topic to talk about in the future.
The street level room has a thin cut solid chestnut tongue and groove flooring. With these environmental ingredients, I knew I didn't want to remove the flooring, experience has told me that French chestnut floors are a pain to remove due to their secret nails and expensive to replace. Using metal hangers with nails would encourage condensation and cause further damage in the future.
As the property is of a traditional build, not wanting to use anything metal and wanting to carry out the fix on the cheap (one after another unexpencted gremlins all mounts up), I chose to go the old school route and use a nibbed scarf joint.
What is a nibbed scarf joint I hear you cry what were the alternatives?
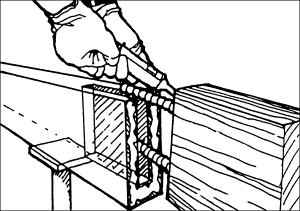
A Scarf joint is; "Over to you Wiki" -

A scarf joint (also known as a scarph joint) is a method of joining two members end to end in woodworking or metalworking.[1] The scarf joint is used when the material being joined is not available in the length required. It is an alternative to other joints such as the butt joint and the splice joint and is often favored over these in joinery because it yields a barely visible glue line.
- http://en.wikipedia.org/wiki/Scarf_joint
For this incidience the rotten joist end were cut off and an angle cut is made to bottom of the beam to allow a new part to be bolted (or dowled) on a good distance from the fulcrum point. As stated before it’s a traditional repair, low cost and can be finished to match the original joist.
The alternative methods are -
Joist Repair Plates

Basically using two "L" section steel, slide in the the joist footing well and farsen to the good part of the joist.
Resin Slice Joist
The rotten end of the beam / joist is cut off. A vertical slot is machined in the joist. A new joist end is drilled to so two or more steel bars can be glued (Resined) in. The new end is then fitted with the bars going in to slot. Resin is then poured in to the slot to secure the new beam end. (This looks to be a pain in the ass!)
Replace the whole joist. hmm, I wouldn't want to do this on my tod!
Last option is only viable if you have a run of end joists to repair - Using Hangers.
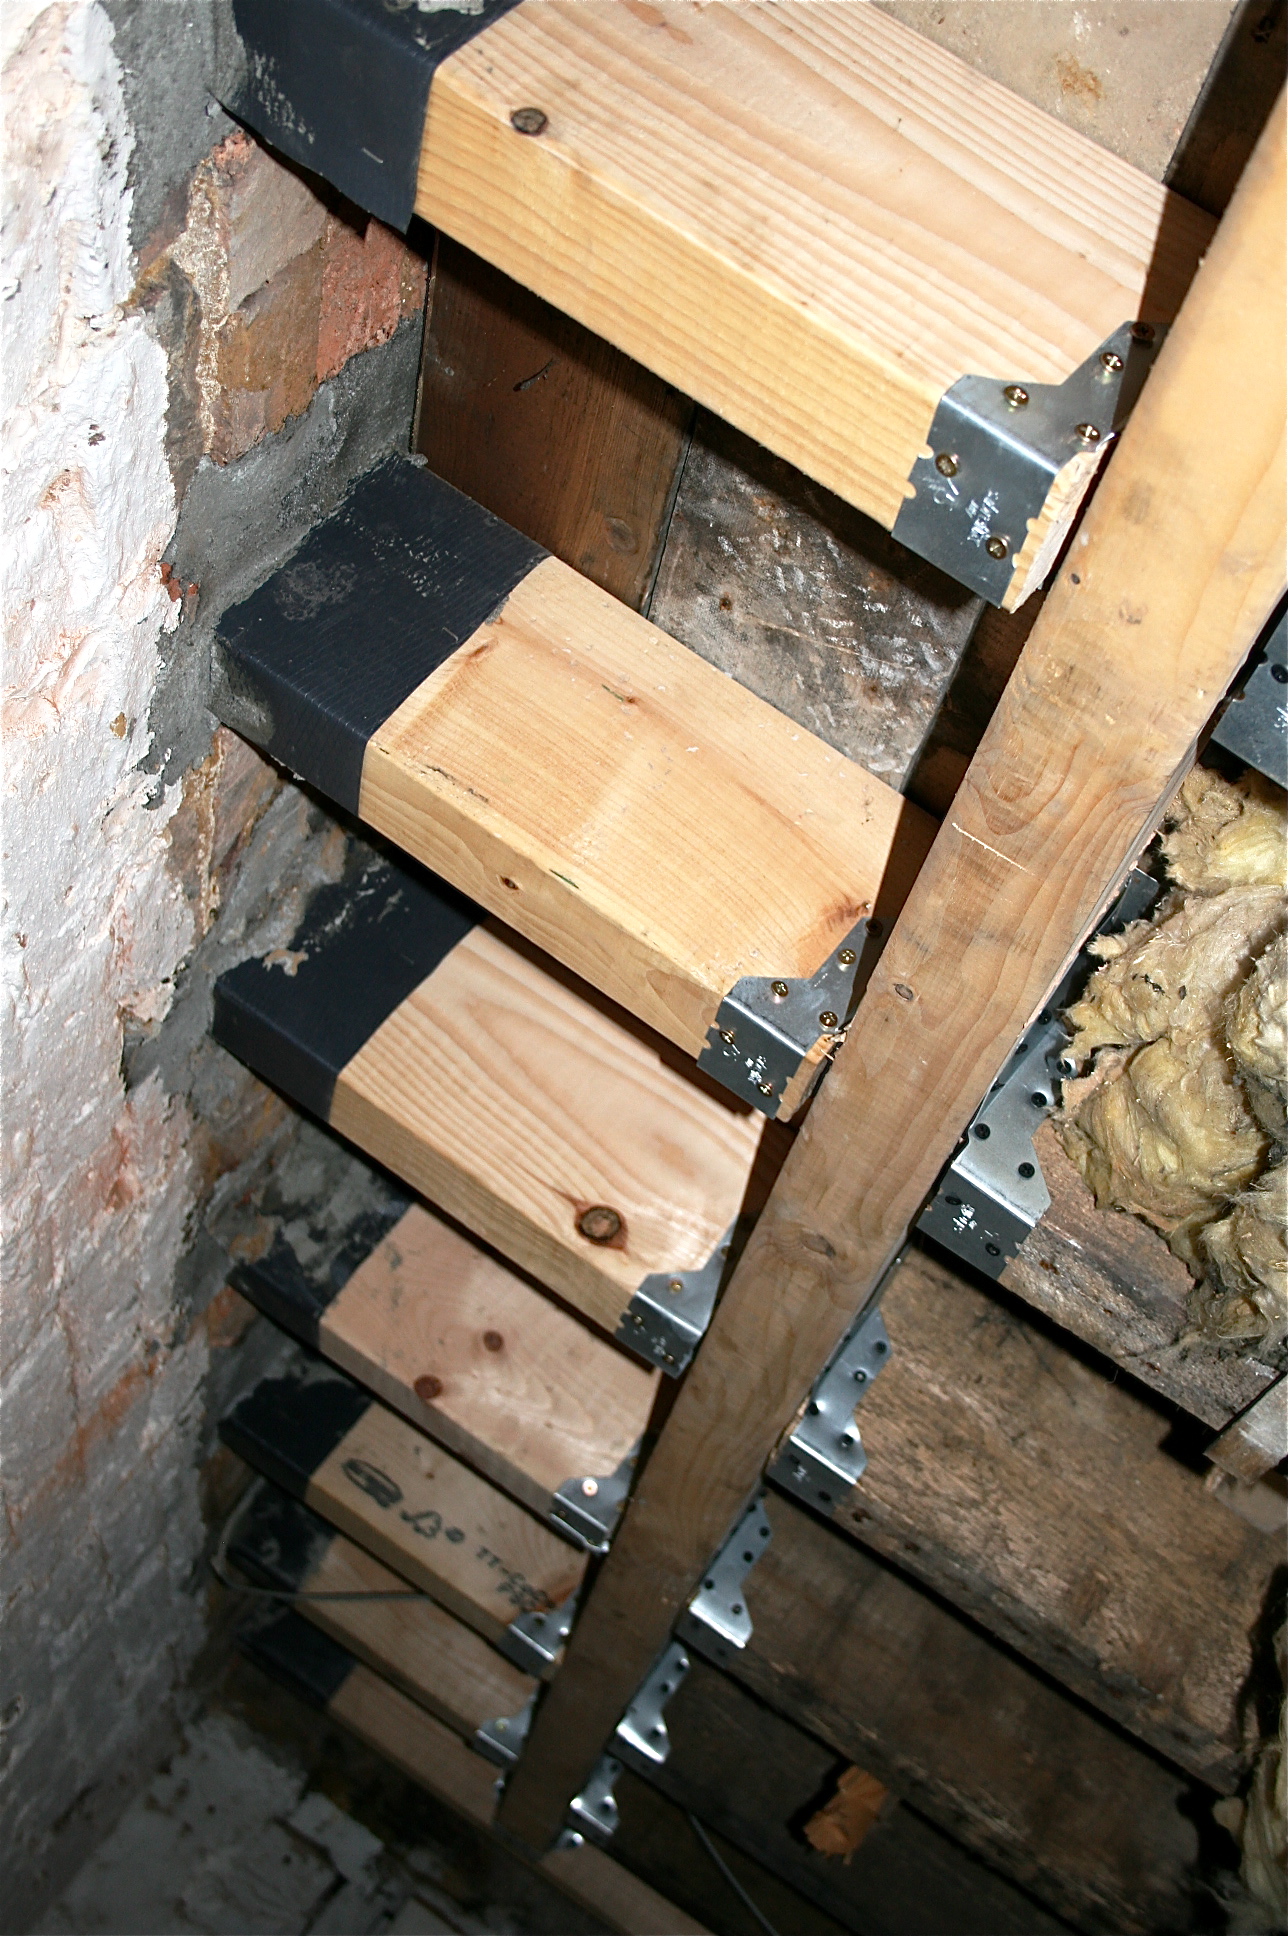
This picture says a thousand words, though I have noticed they used screws. This is not advisable as the screw heads can and will rip off!
Positives with using a scarf join (Nibbed/Vee'd ends) -
Its cheap
Looks good
Can be done without the use of metal.
The finished flooring doesn't have to be removed in you have access from the underside.
Negatives -
Difficult to cut in situ, up a ladder upside down. Difficult to set out and accurate craftsmanship required.
Quite a few tools required compared with the other methods
How is it done and the method I followed.
Obviously for the benefit of this project I have simplified the procedure... But not by much! It really is an uncomplicated breakthrough allowing new, treated timbers to be installed with the minimum of fuss and disturbance.
Timbers are not all accessible from the same place. While you may be able to get to a floor joist from the top by lifting a section of the floor, it is far easier to access a rafter from underneath.
In the below sequence of images I have shown the most basic, repairing a floor joist that is accessible from the basement level.


In the process of renovating our new home, we noticed one of the gable walls was suffering from Damp. After tracing back, looking for the cause I came across a few joists which had rotten ends. The damp patch on the wall was due to a leaky gutter, allowing water to penetrate down the wall on 2 levels and working its way round the corner stones, thus the damp patch.
After rectifying the gutters, next on the game plan was to fix our rotten floor joists ends.
This subject is as broad as it is wide. Online, you'll find many options as well as different methods of resolving this problem. I'll explain which method of resolution we chose as well as how I executed the fix. This job will not be for everyone but worth being aware of.
In our scenario, the floor joist reside in a street level, north facing room. The room below is basement level, no windows, and granite dry stone walls. The basement room does suffer from severe humidity which is another topic to talk about in the future.
The street level room has a thin cut solid chestnut tongue and groove flooring. With these environmental ingredients, I knew I didn't want to remove the flooring, experience has told me that French chestnut floors are a pain to remove due to their secret nails and expensive to replace. Using metal hangers with nails would encourage condensation and cause further damage in the future.
As the property is of a traditional build, not wanting to use anything metal and wanting to carry out the fix on the cheap (one after another unexpencted gremlins all mounts up), I chose to go the old school route and use a nibbed scarf joint.
What is a nibbed scarf joint I hear you cry what were the alternatives?
A Scarf joint is; "Over to you Wiki" -
A scarf joint (also known as a scarph joint) is a method of joining two members end to end in woodworking or metalworking.[1] The scarf joint is used when the material being joined is not available in the length required. It is an alternative to other joints such as the butt joint and the splice joint and is often favored over these in joinery because it yields a barely visible glue line.
- http://en.wikipedia.org/wiki/Scarf_joint
For this incidience the rotten joist end were cut off and an angle cut is made to bottom of the beam to allow a new part to be bolted (or dowled) on a good distance from the fulcrum point. As stated before it’s a traditional repair, low cost and can be finished to match the original joist.
The alternative methods are -
Joist Repair Plates
Basically using two "L" section steel, slide in the the joist footing well and farsen to the good part of the joist.
Resin Slice Joist
The rotten end of the beam / joist is cut off. A vertical slot is machined in the joist. A new joist end is drilled to so two or more steel bars can be glued (Resined) in. The new end is then fitted with the bars going in to slot. Resin is then poured in to the slot to secure the new beam end. (This looks to be a pain in the ass!)
Replace the whole joist. hmm, I wouldn't want to do this on my tod!
Last option is only viable if you have a run of end joists to repair - Using Hangers.
This picture says a thousand words, though I have noticed they used screws. This is not advisable as the screw heads can and will rip off!
Positives with using a scarf join (Nibbed/Vee'd ends) -
Its cheap
Looks good
Can be done without the use of metal.
The finished flooring doesn't have to be removed in you have access from the underside.
Negatives -
Difficult to cut in situ, up a ladder upside down. Difficult to set out and accurate craftsmanship required.
Quite a few tools required compared with the other methods
How is it done and the method I followed.
Obviously for the benefit of this project I have simplified the procedure... But not by much! It really is an uncomplicated breakthrough allowing new, treated timbers to be installed with the minimum of fuss and disturbance.
Timbers are not all accessible from the same place. While you may be able to get to a floor joist from the top by lifting a section of the floor, it is far easier to access a rafter from underneath.
In the below sequence of images I have shown the most basic, repairing a floor joist that is accessible from the basement level.
(Setting out the cut.)
(Cut Vertically to the diagonal line.)
(Cut along the setting up lines.)
(Chisel, plane & sand till its perfectly flat.)
(Make a left & right template and map out onto replacement timber.)
(Position, fix using dowel, 90degrees from the diagonal.)
Conclusion:
In fairness, this isn't the easiest of jobs. I would've preferred using hangers from an ease point of view. Though more material would have been required, all you would have needed is a saw, and a hammer.
No comments:
Post a Comment